Ubiquiti PtP Radio Aiming Tool
This was a quick project to see if a laser pointer could help align point-to-point wireless radios (wireless bridges). While Ubiquiti radios have built-in alignment tools, I’ve always found them finicky. This was especially true with the airFiber 60 HD that I set up a few months ago. The problem with the built-in tools is that they’re sluggish: you make an adjustment, stop, wait for the radio to catch up, rinse and repeat. Oh, and since I was doing this solo, I had to bounce back and forth between two rooftops.
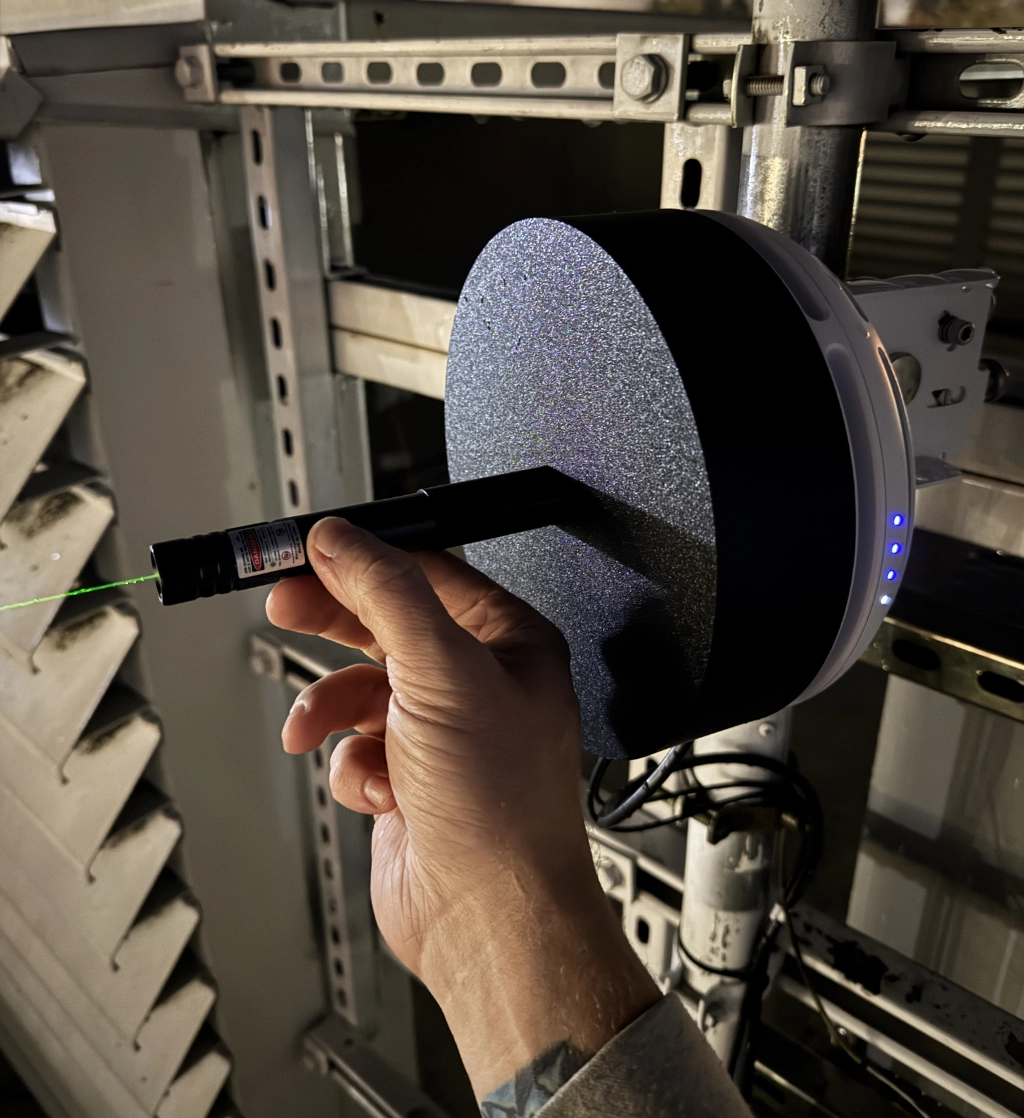
The airFiber 60 HD link was fairly short (a couple hundred feet), so alignment shouldn’t have been too difficult. However, despite my best efforts with the adjust-stop-wait-repeat method, the radios would, after a few days, decide they were no longer properly aligned. I suspect the beamforming feature (which tries to adjust alignment automagically) was messing with things. Frustrated, I decided to try using a laser for alignment. I designed and 3D-printed a holder that slipped over the front of the radio. Conveniently, the airFiber has a flat face that made this possible. Quick and dirty as it was, it worked surprisingly well.
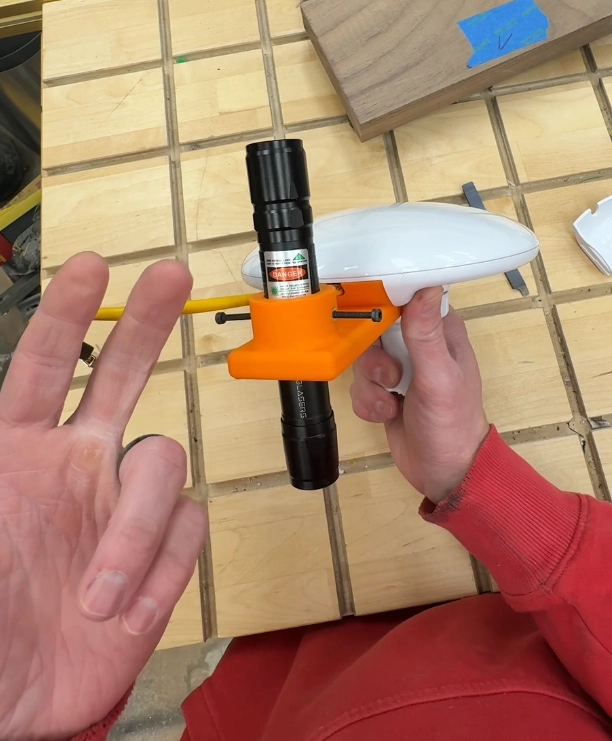
I then had another project setting up a wireless link at a remote site for video monitoring. This one was about 1,700 feet away, and I used NanoBeam 2AC radios. I had installed these for the same link before, and they’re usually easy to align. But since the laser trick had worked once, I figured I’d give it another go. Unlike the airFiber, the NanoBeams have a domed face, so I had to come up with a different mounting solution. Fortunately, I found someone who had already modeled the back cover of the NanoBeam. I modified it to include a laser mount and printed one for each end, one holding the laser, the other acting as a “target.” In practice, the target turned out to be unnecessary because the laser beam divergence made the dot much larger than expected.
Beam divergence is definitely something to consider. Based on the laser pointer’s specs, I calculated the beam diameter at ~5 feet over that distance, but I decided to test it anyway (the pointer is also focusable). In reality, the beam ended up around 1–1.5 feet in diameter, which was still useful for rough alignment. If you’re trying to align over a longer distance, you’d probably need a laser with less divergence or a method to reduce it (both of which get expensive fast).
The real issue, though, was that the NanoBeam’s alignment adjustment is ridiculously coarse. Unlike the airFiber, which has fine-tuned adjustments, the NanoBeam uses a plastic ball-and-socket mount. Trying to get precise alignment, while standing in a lift, in the rain, with the wind, was nearly impossible. That said, the laser still helped ensure I was in the right general direction, so it wasn’t a total failure. At shorter distances, I think this method could be quite effective.
My son suggested a possible workaround: packing the ball-and-socket joint with grease might allow for finer adjustments by keeping the tension nut loose while still holding the radio in place. If you try this, just make sure to use a grease that’s compatible with plastic.
In any case, if you’re interested, the STL files for the laser mounts are below. The laser pointer I used for the airFiber radios is this one (200mw), and the one for the NanoBeams is this one.
Note that the airFiber tool is two parts, you need to glue them together, I recommend this glue (just a dab will do).