Coin Operated Xbox
We don’t have any issues with our Child Units™ playing video games. However, the XBOX has a way of making our CU’s oblivious to the rest of the world. This creates all manner of issues, from the dogs not being let out, to chores not getting done at all or completely.
I started to think about a way to control access to the XBOX – the length of time it could be played, a way to forcefully stop game play at set intervals, and make it so that playing it was something you had to earn.
While the XBOX has “parental controls” they don’t work the way I’d like them too. You can set content restrictions and on-line restrictions but can only set a daily or weekly play limit. So, I could broadly limit the amount of playtime but I wanted more granular control and was looking for a way to stop game play and say “Let the dogs out!” or “Go finish the dishes!”
I almost immediately thought of a using a coin or token system as the access control. I took to Google, I was sure someone had done something like this already.
It turns out that someone had. Ben Heck, famous console modder, made a token operated XBOX.
While Heck’s coin operated XBOX was perfectly serviceable, it had, in my humble opinion, at least one major flaw. It used a relay to literally cut power to the XBOX. This method of control is no different than pulling the XBOX’s power cord out of the socket. Fine, if the system was properly powered off first, but struck me as a harsh way to treat the console. Also, I preferred to keep the console on so if the player wanted they could come back later and resume where they left off. All that said, Heck’s idea did serve as inspiration for my device.
Beter Way
I was trying to do this without having to crack open the XBOX. Why hurt potential resale value? Why make a system that’s not portable to another XBOX or console (especially with a new XBOX right around the corner)? Whatever the solution was, I didn’t want to have to crack open the XBOX. I wanted it to be universal, and easily portable to another system or device.
Controllers
Making a device that disabled or enabled the controllers occurred to me, and would be easy to implement, but would only be viable if we used wired controllers exclusively. We don’t.
I came across some “commercial” systems on eBay but they all shared fatal flaws – 1) They were all stupid expensive. 2) They all appeared to be cheaply made. 3) They all relied on disabling/enabling wired controllers.
Humph.
Video is The Key
At some point while mulling it over, it occurred to me that the best way to accomplish what I was after would to to control the video output of the XBOX. If I could somehow enable and disable the XBOX’s video output to the TV, then I could use that to control when and for how long the XBOX was played.
I briefly considered using IR to turn the TV on and off but dismissed that since I didn’t like the idea of power cycling the TV at high intervals. And it could be easily bypassed by way of the physical power button.
I also considered hacking an HDMI cable up and using a relay between one or more of the signal wires. But again, I dismissed the idea since I was sure that it would probably not work very well.
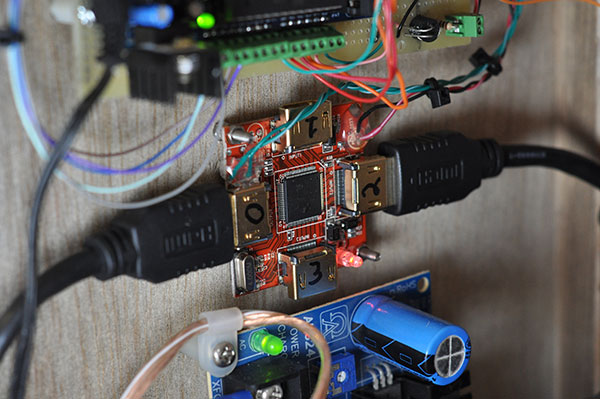
Finally, it occurred to me that I could accomplish the same result by using an HDMI switch. When you want to prevent use of the XBOX just set the switch to an unused input on the switch.
I went to Monoprice and bought the cheapest HDMI switch that they had. When it arrived I begin testing by removing the selector button and soldering in some wire leads in its place. I connected those leads to the photocell side of an optocoupler and the LED side to an Arduino. Using the button sketch I checked to see if I could trigger the HDMI switch with the button connected to the Arduino.
It worked well. Using an optocoupler had a couple of advantages:
-
I already had some on hand.
-
It kept the Arduino and the HDMI electrically separated while still allowing the Arduino to control the HDMI switch.
The next step was to figure out how to accept coins. A coin mechanism, like the one used in Ben Heck’s device, was the obvious choice but I wanted to try something I already had on hand.
I have this electronic coin-cup that you’re supposed to keep in your car’s cup-holder. As you insert coins through the slot it counts the coin’s value and displays the total amount of all deposited coins on a small LCD.
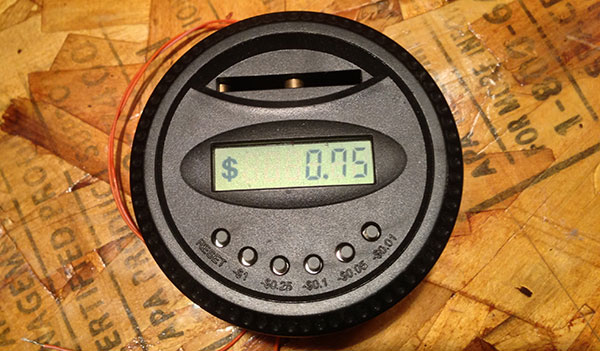
I disassembled the coin-cup and found that it worked by way of a series of contacts. As you inserted a coin a spring-loaded lever with a contact would swipe across the contacts on the PCB, once the coin was all the way in the lever would snap back to the starting position. The system would register the denomination of the coin based off the last contact the lever was at.
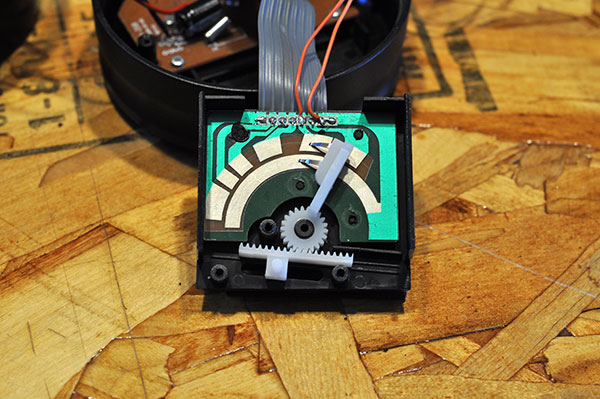
I soldered some leads on the contacts for the quarter and did some testing. Unfortunately, it proved to be impossible to get an accurate and consistent reading using the coin-cup mechanism. After a few tests I opted to go with a more conventional coin mechanism.
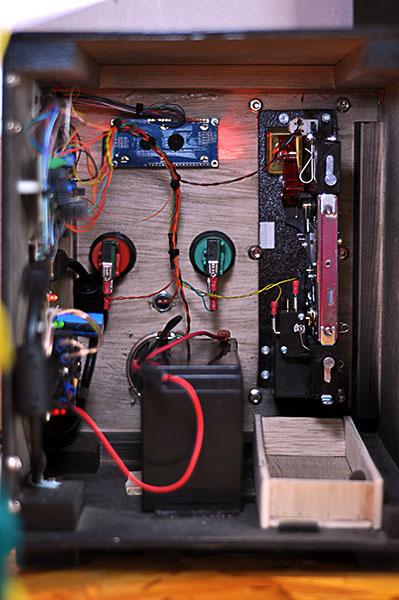
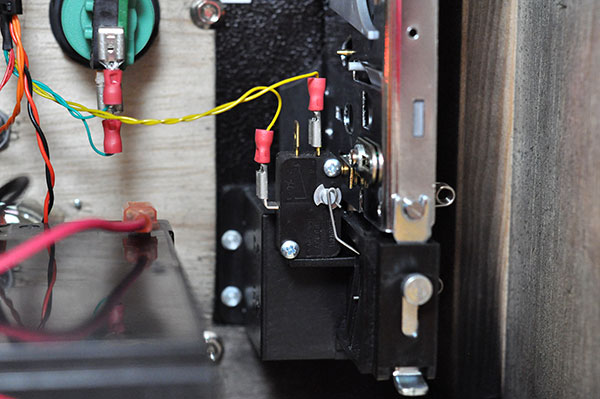
The coin mechanism I used is the same one Heck used. Because it only accepts one coin and detects a deposited coin by using a momentary switch, it’s dead simple to use with the Arduino. It has some basic anti-fraud features which prevent the use of slugs, or other non-legit currency and once I got the debouncing dialed in it proved be very reliable and consistent.
Fair warning though, like popping bubble-wrap bubbles, depositing coins in this is quite enjoyable and addicting.
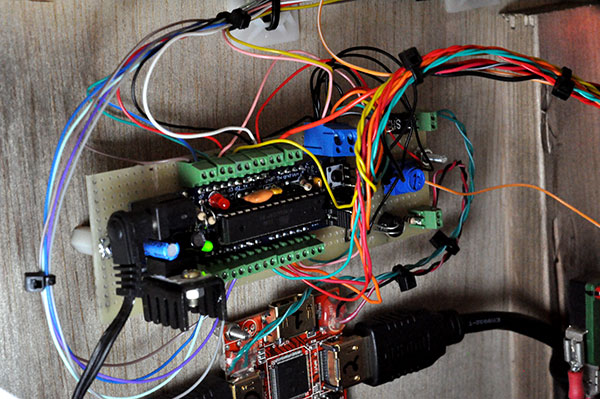
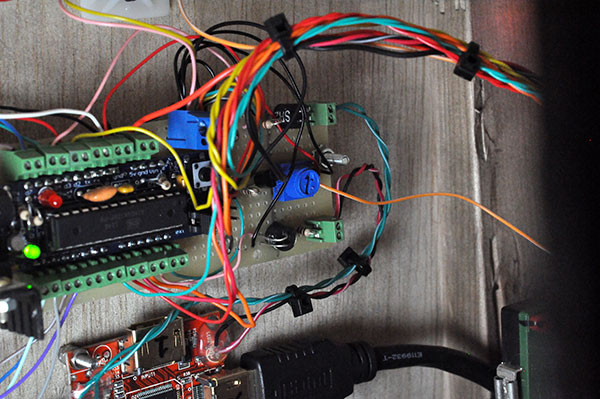
Bringing It All Together
Once I got the coin mech and HDMI switch figured out I begin to write the Arduino code to control everything. Since the HDMI switch had 3 inputs I had to first figure out a way to detect when the input the XBOX was connected to was active or inactive. My initial thought was that I would simply count the number of “presses” needed to get from active to inactive and back again. For example:
-
If the XBOX was on input 1, to deactivate the video, I’d program the Arduino to “press” the button once setting the active input to 2 (thus to deactivating the video from the XBOX).
-
To reactivate the video from the XBOX I’d program the Arduino to press the input selection two times (once to get to input 3, a second again to get to input 1).
The counting method worked but it felt a bit kludgy to me and I realized that I could use another optocoupler to detect when the HDMI switch was on the correct input or not. I removed the input 2 indicator LED from the switch (more on why I used input 2 later) and, like the selector switch, soldered some leads in its place and connected the LED side of the optocoupler to those leads. The photocell side of the optocoupler was connected to the Arduino. When input 2 of the HDMI switch is active the optocoupler LED turns on, causing the resistance between the photocell leads to lower. This resistance lowering is akin to a switch closing and is programmed as such in the Arduino.
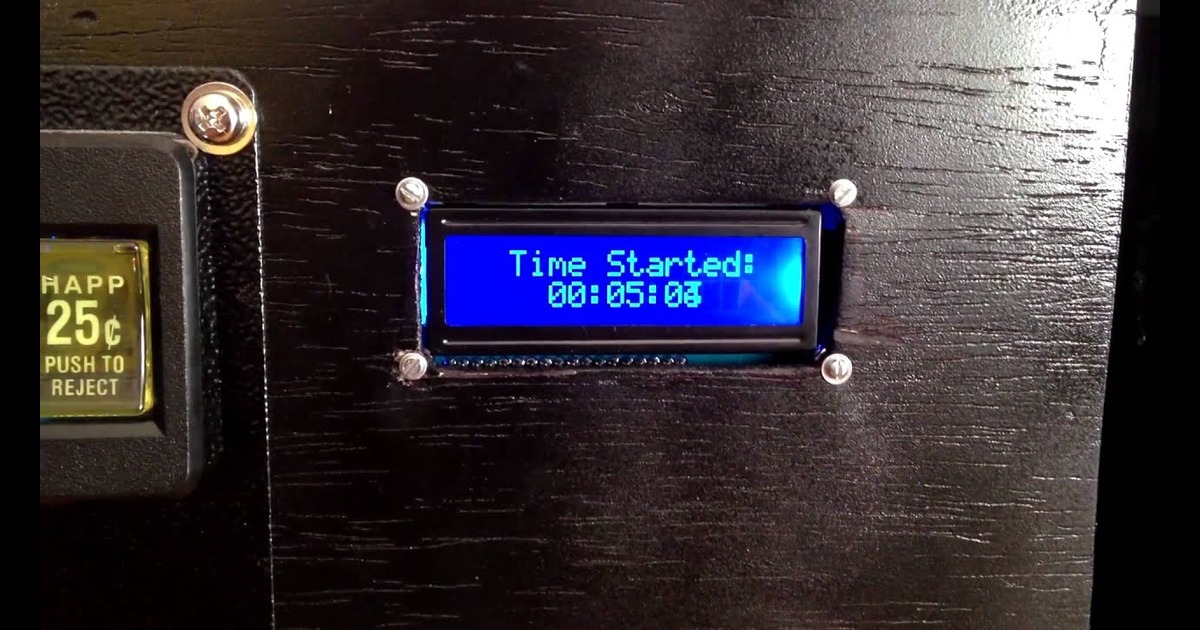
The last major piece of hardware was the display. I initially thought I’d use one or more 7 segment displays (like what Heck used in his). I also thought about going the dead simple route and just using LEDs to indicate the state of the system. But I really wanted something that would display and count down the remaining playtime a la “TV bomb.” Finally, I decided to go with a full fledged 16 character LCD. I’d not used one with an Arduino before but Adafruit has a great tutorial on how to get them working.
The only issue with using an LCD is that it takes so many PINs. I took a fair amount of time planing out exactly what I’d be connecting to the Arduino to make sure I’d have enough PINs to connect everything to. One way I eliminated the need for some PINs was to use an RGB backlit LCD display. Instead of using individual LEDs for indicators, I could just change the LCDs backlight color.
For the actual Arduino I used Adafuit’s DC Boarduino because it’s cheap enough to embed permanently, has all the standard Arduino PINs, and the form factor lends itself to permanent installation.
Code
At this point I had the major hardware pieces worked out and begin to figure out how I was going to glue it all together with code. Throwing stuff at the wall and seeing what sticks is the extent of my coding skill but at this point I’ve done enough with the Arduino to feel confident that I could accomplish what I set out to do.
A bit back I was working on a project for someone and I went to the Arduino forums for some help. One poster suggested that I write the sketch as a state machine. Vaguely recalling what a state machine was, I dismissed it since I was so far along with the way I had done it and didn’t feel like going down a rabbit hole at the time.
Initially, I started to write the sketch for this project the same way I always had but realized that while I could probably get it to work, there had to be a better way. The more I thought about it the more I realized that using a state machine would probably be the best way to go.
Needing to refresh my noggin, I went searching for information on implementing state machines with the Arduino. The problem is that most of it made my head spin… It’s one of those topics where you have a lot of people explaining the concept while seemingly in a contest to make it sound as complicated as possible. Finally, I came across this post by Matt of Hacking Majenko which brought it all together for me.
I won’t get into state machines here (go read Matt’s post). I will quote Matt’s definition of a Finite State Machine (FSM) so you have at least some idea of what I’m talking about as I go on.
Put simply, a Finite State Machine… is a computer program that, at any point in time, can be in one of a pre-determined number of states. A state is a specific action, such as “Waiting for button 3 to be pressed”, or “Moving the servo to 69°”, for example.
I started out by determining at a high level how many states I would need and what their functions would be.
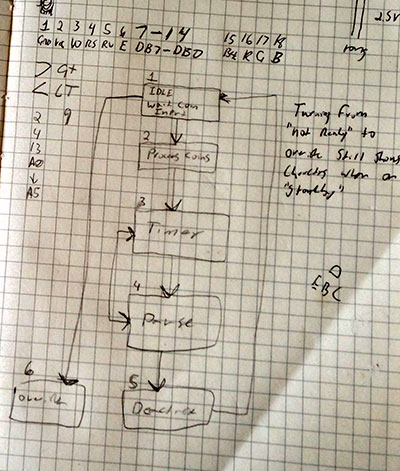 Initially I started out with 6 states. In the final code I used 7.
I ended up with 7 states:
-
ready – The default state where the system sits and waits for the depositing of coins.
-
coin – The state that the system goes into once a coin is deposited, this is the state where the coins are counted. The system stays in this state until the Start button is pressed.
-
pause – The state the system goes into if the Pause button is pressed while in the S_countdown state.
-
override – The state the system goes into if the Override switch is turned on. The system can only go into this state from the S_ready state.
-
limit – State the system goes into if the coin deposit limit is reached. Player is prompted that they reached the limit and to press the Start button.
-
countdown – The state the system goes into after the S_set_timer state is exited. The allowed playtime countdown begins.
-
choretime – The state the system goes into once the time limit it reached. As programmed the system stays in this state for 30min before going back into the ready state.
The states are the only thing that exist in the main loop and each state has a corresponding function. Other than the call to the respective functions there’s no other code in the state blocks. Along with the other advantages of using a state machine, this format makes the code much more readable than it otherwise would have been.
The Wife Unit and I decided that 25¢ would equal 30 minutes of playtime. The demo video below shows the system operating in it’s initial form, where you could put in $4.00 worth of quarters for up to 8 hours of playtime. At this point the mandatory “chore time” state shown in the first video was not implemented. I set it up this way at first to show that the base system could be programmed to function in a number of ways, provided you can work your way through some Arduino programming.
After letting the CUs use the system for a bit I went back and set the system up the way I’d originally intended. Only 1 hour of playtime ($1.00 worth) was allowed and after any session (be that a half-hour or hour) the system would go into the chore time state where the video was shut off for 30 minutes.
Operation of the system is simple and straight forward:
-
The player deposits a coin and press the green “start” button to begin playing. If the player deposits $1.00 then the screen displays a “limit reached – press start” message to prompt the player not to deposit any more coins; they can but the system won’t process them.
-
Once the timer has started the player can pause the timer indefinitely, but the video also gets shut off while it’s paused.
-
At the 5 minute mark the system starts to sound a beep every minute to alert the player that their time is about to expire.
-
At 10 seconds the system beeps every second.
-
Once the time is up the system goes into the chore time state where the video is switched off for 30 minutes.
-
The system sounds beeps at the same 5 minute and 10 second marks as when it’s in the countdown state.
-
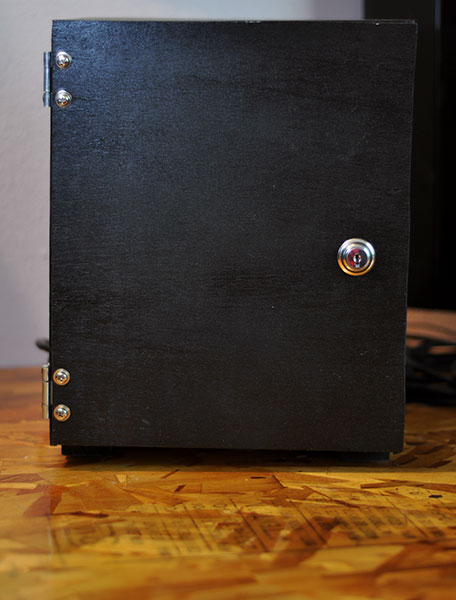
If the system is in the ready state you can use a key switch to enable the override state where the video will be turned on and stay on until the override is turned off.
I considered several options on how to implement the pause functionality. One idea was to just let it pause for a fixed period of time and then automatically un-pause. Ultimately, I decided that letting the player pause the timer indefinitely but disabling the video during the pause was the best option. Turns out this works out well because inevitably one of the CUs will have paid for some time only to then be told that it’s time for dinner, bed, etc. Letting them pause indefinitely means they can come back later and use the time they paid for.
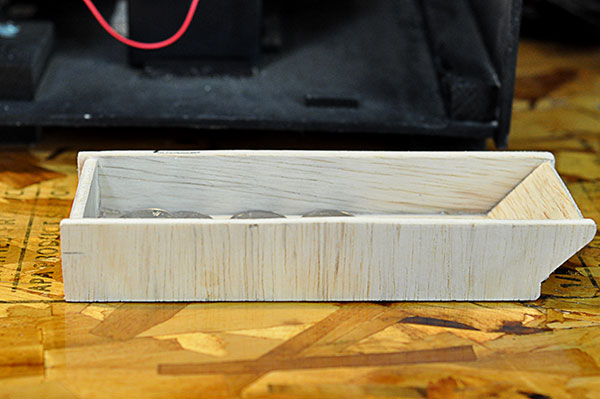
A Word On Exploits
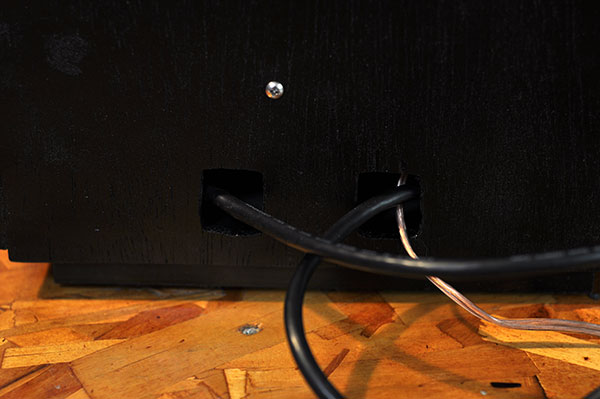
This was never meant to be super high-security. Along with the fact that it’s all housed in a wooden box there are a number of simple ways to exploit the system to either play for free or to play for more time than you paid for. I addressed basic physical security concerns (for example, making access to the coin mech. and electronics a bit less than easy) and I think I resolved all the software related exploits as well. If this system was implemented in a less controlled environment and/or with less trustworthy people, you’d have to devote more time to addressing the security of the system.
Obviously, unless you took steps to prevent access (and I didn’t) one could easily bypass the coin system by connecting the XBOX directly to the TV. This isn’t something that’s easily done though (especially without getting caught) with the way our XBOX and TV are situated so I didn’t worry about it. If you do worry about it, all you’d have to do is prevent access to the HDMI output of the XBOX.
The HDMI switch that I used (and probably most out there) has and auto-switch feature. When used in a traditional manner, if the switch is on an inactive input (say, for example input 1) and another input becomes active (say input 2) then it will automatically switch to the active input (input 2 in our example). The upshot is that for every state where the video is supposed to be off, you have to actively check to make sure the video is and stays off. I used a while statement that basically says “if the XBOX input is on, run the video off function until it goes off.” This while statement is used in any state where the video should be off to prevent the auto-switching function of the HDMI switch from turning the video on when it’s not supposed to be.
Good CU
Shortly after putting the system into service CU-2 discovered a bug caused by the auto-switch “feature” of the HDMI switch. At this point I had programmed it so that in the ready state the system was keeping the video off (using the while statement mentioned above). But once a coin was deposited the system was in the coin state which didn’t have the while statement to check that the video was and stayed off. The upshot was that if you left the XBOX powered off, deposited a coin and then turned the XBOX on, the video would turn on. As long as the Start button was not pressed the video would stay on indefinitely at this point because, in the coin state, the Arduino was not checking to make sure the video was off. This was easily solved by adding in the same “turn the video off and keep it off” while statement to the coin state function as well all the other functions where the video didn’t need to be or shouldn’t be on.
I know what you’re thinking. “Why would the CU tell you about this exploit!” Well, I have awesome CUs. I’m sorry if you don’t.
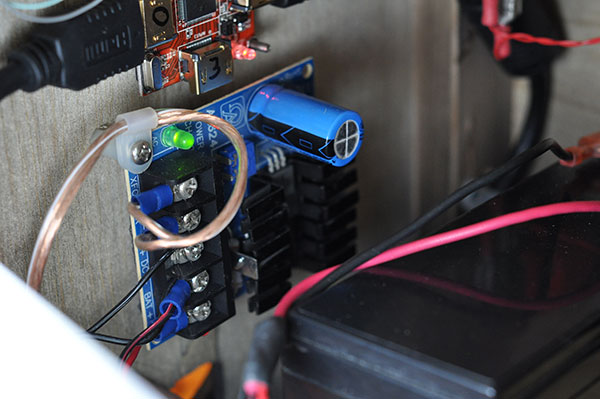
One other exploit that would take advantage of the auto-switch would be to disconnect power to the Arduino. For the Arduino to control the HDMI switch the Arduino, obviously, has to be powered on. Nothing was done to the HDMI switch that would inhibit it’s standard function if the Arduino was not powered on and able to control it. So if power to the Arduino was disconnected and you turned the XBOX on, you’d get video, again, because of the auto-switch feature of the HDMI switch. Now, the whole system is housed in a locked box, but the power is still external and unless you cared to secure it, it could be manipulated – i.e. unplugged. Frankly I was not that concerned about this but since I had it sitting unused in a parts bin for the last few years, I added a battery backup to the system. The battery backup uses an power supply/SLA battery charger that will automatically switch to the battery if primary power is lost. Again, I was not really concerned with this being an issue (after all CU-2 told me about an exploit rather than take advantage of it) but I had the hardware sitting idle and decided to throw it in.
Finally, when switching on the video it takes a second for the TV to sync up and show a usable picture. To make it all fair I programmed the system to add 1 second of playtime every time the video is switched on. Someone in the Arduino forums pointed out that this can be used as an exploit. You pause the timer, up-pause it and then really quickly pause it again. Each iteration of this, if your timing was just right, you’d gain a whole second of playtime.
Final Thoughts
Input 2?
I found that when switching inputs from 1 to 2 I’d get a ghost image on the TV. The video was still off but you’d have whatever was last on the TV still showing on the screen. It’s a $10 HDMI switch, what do you expect? This didn’t hurt anything but it made operation kind of confusing, I didn’t get the ghosting when going from input 2 to 3 though.
Display
The LCD display is a bit more sensitive, or I was more rough with it, than I thought. Being an RGB backlit display you can use the PWM on the Arduino to get any number of colors from the display. At some point while I was putting everything in the box the display started to have issues showing anything but the primary colors correctly. The primary colors would also go from dim to bright and the backlighting became more uneven than it had been initially. I think this was due to me not paying attention and wrenching down the screws when I was mounting it. It still serves its function though and I just set it to display the main colors.
Beep
I used an NPN transistor as a “amplifier” to make the Arduino generated beep louder than the Arduino could do on its own. It’s quite effective.
PINs
I literally used all the PINs on the Arduino for this project (I used the analog PINs as digital inputs). Most of the PINs were used by the LCD display. You can significantly (needing only 2 or 3 PINs depending on protocol used with the backpack) reduce the number of PINs need for the LCD by using an LCD backback.
It occurred to me that if you used an LCD backpack and freed up some of the Arduino PINs you could extend the capabilities of the coin system to allow you to control access to multiple devices. Using a multi-input HDMI switch you could connect optocouplers to all the indicator LEDs, and use those to detect which input was active/inactive. With some additional coding you could then setup a menu that asked the player which device they wanted to use – XBOX, Playstation, TV, etc.
Images, Schematic and Code
Arduino Sketch (GitHub)
Schematic (PDF)