Refrigerator Controller/Thermostat

A bit back I opened my office mini fridge and found that it was warm. I checked all the obvious things: it was plugged in and getting power, and the thermostat was set correctly. Deeper diagnostics revealed that the thermostat was faulty. No matter the thermostat setting, it was not engaging to cool the fridge. If I bypassed the thermostat and manually (i.e. shorted the compressor leads) started the compressor the fridge cooled as it should.
I was unable to find an OEM replacement thermostat but figured I could make a replacement for less than a new fridge would cost.

The old thermostat is completely mechanical. It uses a plunger that expands and contracts based on the temperature of the fridge (I’m guessing). The plunger is attached to an electrical contact that moves with the plunger. The temperature dial that you use to set the temperature pushes or pulls the contact closer or farther away from a second contact. When the two contacts connect, it completes the circuit and starts the fridge compressor, cooling the fridge. The closer the contacts, the more the fridge is cooled, the father the less it’s cooled.
The fact that the old thermostat is mechanical makes replacing it simple because I can use a relay in place of the mechanical thermostat. I did some probing to find the load that would be on the relay and found that it was be surprisingly low.
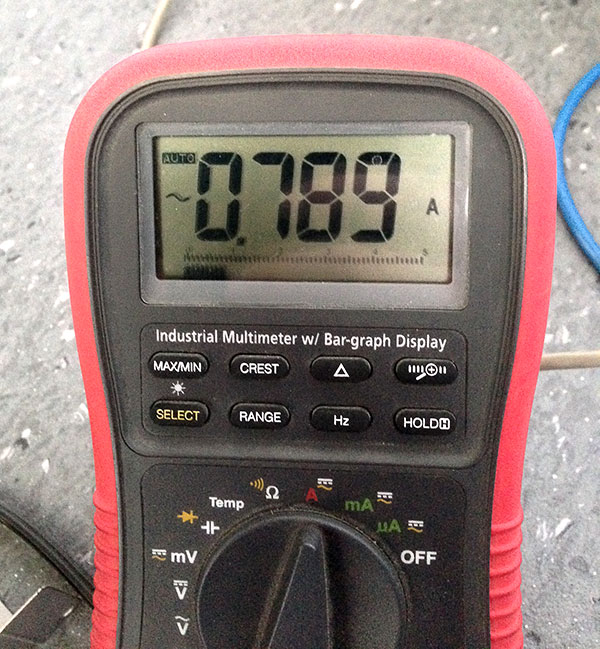
When the compressor is running there is barely less than an amp being drawn. I was a little surprised that it was so low, but then again, it’s a small fridge. However, there is one very important caveat.
When the compressor first turns on there is a 2-3 second period where the compressor draws 5 amps. In addition to this, if the fridge is short cycled (turned on too quickly after being turned off) the current draw will stay at 5 amps for several seconds before the compressors thermal breaker trips. The upshot is that despite the low running current, I need to use a relay that can withstand 5 amps, preferably more.
How It Works
It’s probably important to have at least a cursory understanding of how a fridge compressor system works before you hack one. So I did some reading to insure that what I was planning to do was not going to blow anything up.
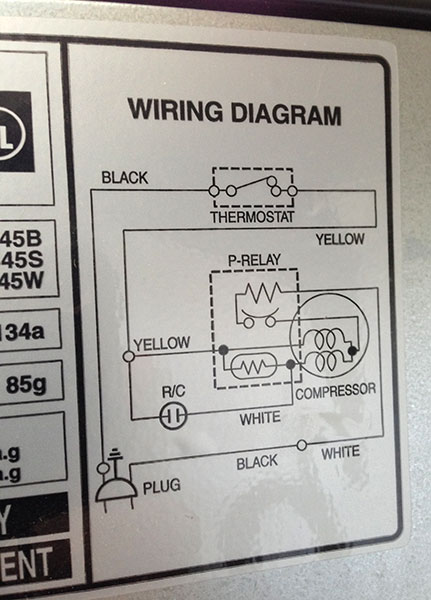
Putting it as simply as possible: When the thermostat trips (i.e. calls for cooling), power is applied to two coils in the compressor; the Start and Run coils. You’ll notice in the wiring diagram above that there is a relay inline with one of the coils (labeled “P-Relay” in the diagram but more commonly called a PTC relay). Once power is applied to the coils the current running through the P-Relay starts to heat it up.
The Start coil is only needed to get the compressor going, once the compressor is going, the Start coil can be de-energized to increase efficiency. This is where the P-Relay comes in, the P-Relay is thermally sensitive, once it heats up to a pre-configured threshold, it trips, disconnecting power from the Start coil and leaving only the Run coil powered.
Powering the two coils is what causes the initial 5 amp surge when the pump first starts. But it only needs to power the two coils for a few seconds (1-2 seconds by my measurements) to overcome the pressure of the refrigerant.
One important thing to note is that most fridges don’t like to be powered back on too quickly after being powered off. The reason for this is that when the compressor is running it’s pumping refrigerant through the condenser coils which creates high pressure, this is fine as long as the compressor continues to run. However, if the compressor is powered off and then powered back on before the pressure in the system has a chance to equalize, the compressor seizes. The compressor is not strong enough to start against the high pressure from a dead stop.
For this reason the manual of my mini fridge recommends that you wait at least three minutes before powering on the fridge after it’s been powered off. To prevent damage to the compressor a thermal breaker in the compressor will trip if it gets too hot, as it does if you try to run it too soon after being powered off. The problem is that it takes several seconds for the thermal protection to reach its max temp, during that time 5 amps of current is being drawn by the fridge. So again, I’ll need to use a relay that can handle 5 or more amps. Even with the thermal breaker, it’s hard on the compressor to be frequently “short-cycled” so I’ll want to setup the new controller to prevent the compressor from turning on too quickly.
Design
I’ve always hated the temperature controls that fridges come with. A knob with arbitrary numbers on it is completely useless. I want to be able to set a specific temperature and have a reading of what the actual temperature of the fridge is. Granted, most new fridges today come with digital readouts that give you the temp of the fridge/freezer but there are still a fair number of fridges, particularly cheap mini fridges, that don’t and that’s stupid.
So, along with replacing the thermostat I want to make my mini fridge a little smarter as well. I’ll use a microcontroller (Arduino Pro Mini) with an LCD display to monitor the temperature of the fridge, control the compressor relay, and display information. As mentioned, the microcontroller will also need to be programmed to prevent the compressor from running too soon after being powered off (i.e. – short cycling).
Build
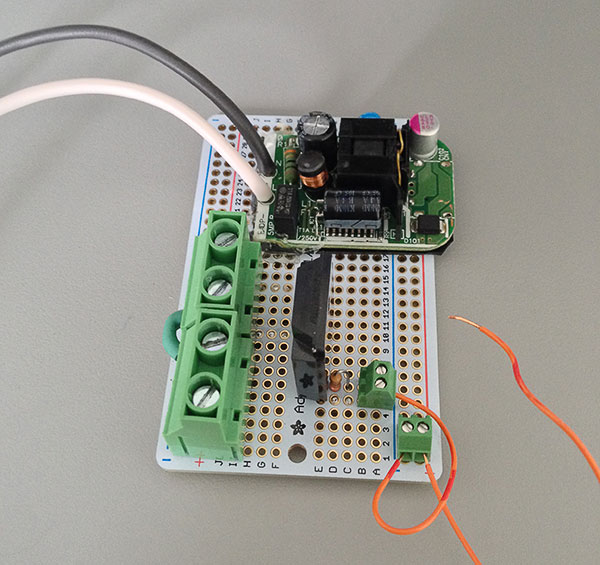
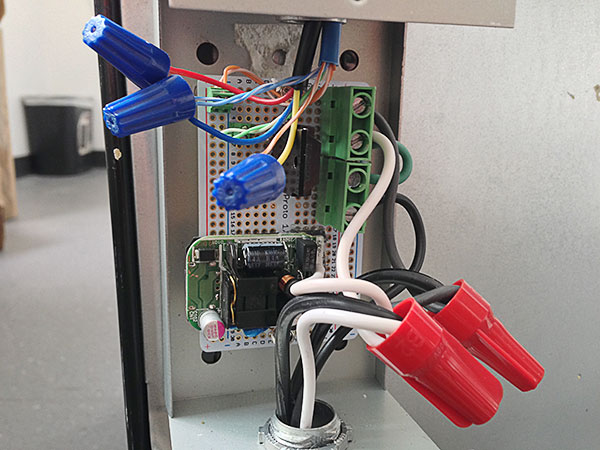
For the relay I used an 8 amp Sharp S102S11F. The S102S11F has a built in snubber circuit so it ideal for inductive loads like this, the 8 amp rating leaves more than enough room for potential high loads. Since it will only see temporary high loads (a few seconds max), I’m not going use a heat sink on the relay.
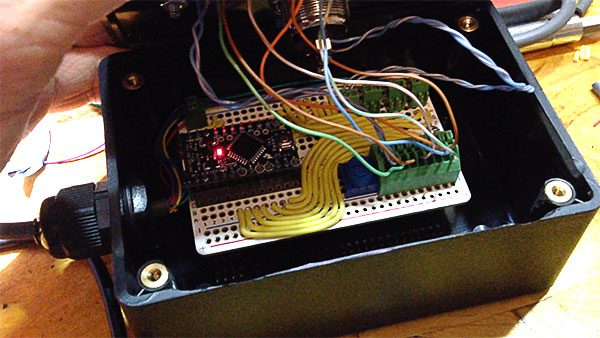
The 5v power supply is a modified wall-wart for powering the Arduino, display and relay. The Arduino is housed with the display to keep from having to run a bunch of wires (for the display) to the back of the fridge. The separation also also keeps the high voltage components at the back of the fridge and away from “user space.”
I started out using a TMP36 analog temperature sensor, which worked well and was simple to interface with but turned out to be to susceptible to noise using long wires. I switched to a DS18B20 digital temperature sensor, which is a bit more complicated to get working (requiring an arduino library) but gives reliable readings even with long wires.
The old thermostat used three wires that ran from the inside of the fridge, out the back. I was originally going to use those wires to connect the DS18B20 to the Arduino but decided against it. I was fairly confident they were not connected to anything else but since I was not 100% sure, I decided to not use them. Instead, I drilled a hole through the side of the fridge and ran the DS18B20 cable through it. If you do this you want to be very careful, I came very close to drilling through the coil which is on the side of small fridges like this.
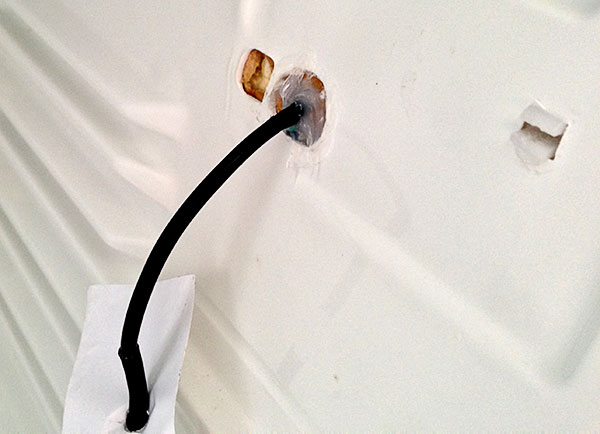
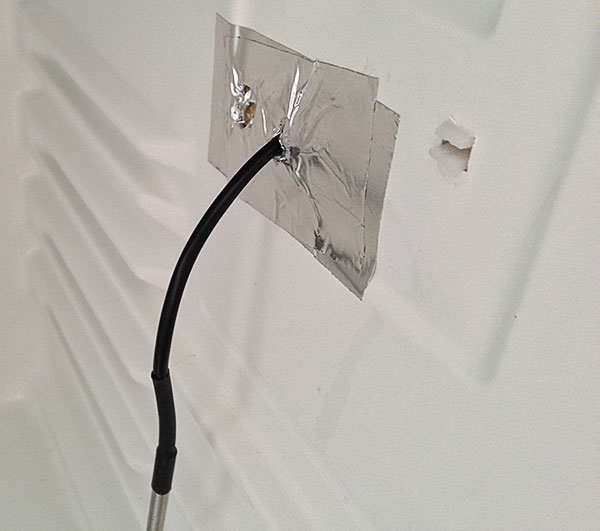
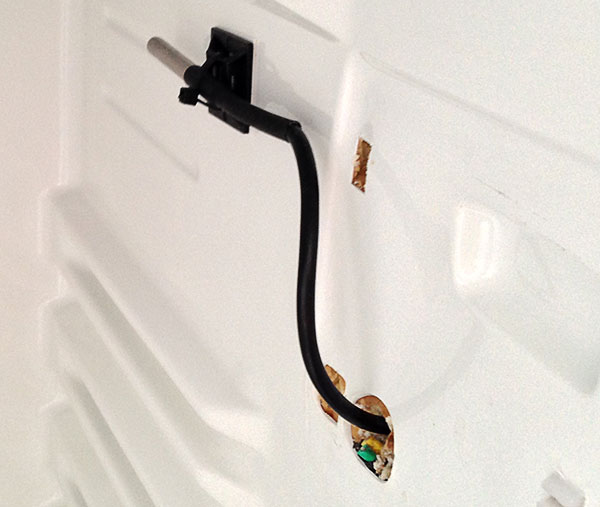
I started with a pre-made waterproof DS18B20 (shown) but ended up having to use a plain DS18B20 and waterproofing it with some tubing and silicone caulk after I fried the first one. Note: the DS18B20 does not like to be hooked up backwards. This was a test fit, I eventually moved the sensor to the back of the fridge in the same place the old one was.
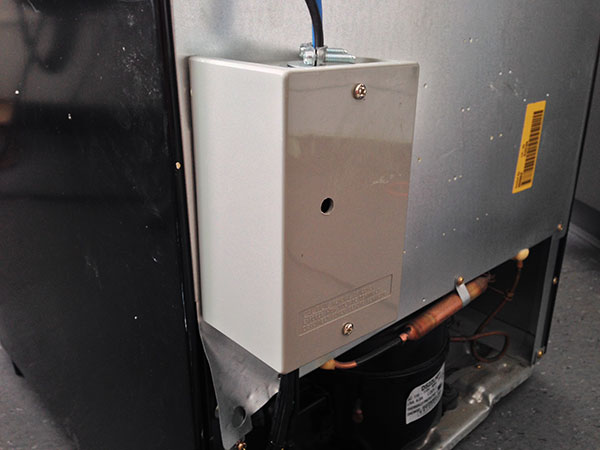
The DS18B20 wire was run to a box on the back of the fridge that housed the HV board. From there it was connected to a CAT5 cable that went to the Arduino on the front of the fridge. The CAT5 was also used to run 5v power to the Arduino, and connect the compressor relay to the Arduino.


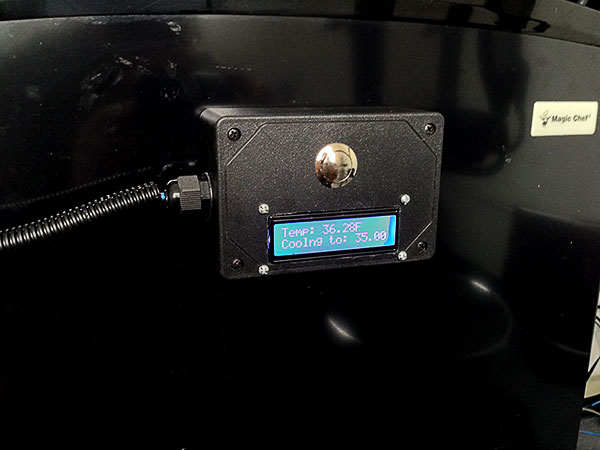
The control box houses the Arduino Pro Mini, LCD, and select button. The Arduino monitors the fridge temperature via the DS18B20, if the temperature falls below the set temperature it powers the compressor relay, which turns the compressor on. By default the system is set to cool the fridge to 35 degrees, but the temp can be manually set to any temp between 32 and 40 degrees.
Code
The code for the Arduino is fairly straightforward. It’s written as a State Machine with three states:
1
2
3
4
5
6
#define S_Monitor 0

#define S_Sleep 1

#define S_SetTemp 2
In the Monitor state the Arduino is actively monitoring the temperature of the fridge, when the temperature falls below the set temperature it turns the compressor relay on to cool the fridge. Once the set temperature is reached, the Arduino switches to the Sleep state for 15 minutes. In the sleep state the Arduino will display the fridge’s current temp but will not turn the compressor on if the temperature falls below the set temperature. After the 15 minutes, the Arduino switches back to the Monitor state and the cycle starts again.
The SetTemp state is used for setting the desired fridge temperature and is only triggered by holding the button down. In the SetTemp state you can use the button to adjust the fridge temperature in 1 degree increments. When you exit the SetTemp state (by holding the button down) the system goes into the Monitor state.
Sleep is the default state, which means that when the fridge (and the controller) are powered on it will sleep for 15 minutes by default. This prevents the fridge from short cycling if it loses power. I initially had the Sleep state last 5 minutes but found that the compressor cycled to frequently for my taste. The issue was that the set temp would be, for example, 32.00° if the temp changed to 32.01° the compressor would come on. The upshot was that the compressor was turning on every 5 minutes.
I thought about programing the controller to only turn the compressor on if the temp was 5 degrees off the set temperature but instead decided to make the Sleep time longer. I found that 15 minutes was just about perfect in terms of the fridge being kept at the desired temp, without the compressor being run too frequently.
Arduino code is available on GitHub
Postmortem
Once I worked out the sleep duration, the fridge stayed within an acceptable range of the set temperature without cycling the compressor too frequently. Checking with external thermometers shows that the temperature reading from the DS18B20 is accurate.
The only thing I can think of to improve the controller, would be to add an audible alarm that would notify you of a potential issue. For example, the alarm could be set to sound if the temperature went above a threshold for too long.